Wireless Setup on MikroTik

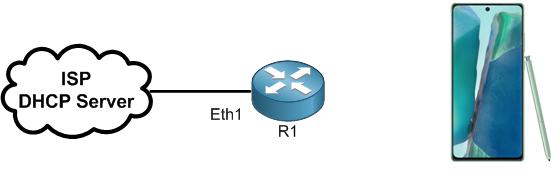
This is my scenario now. I have no any configuration on my router (reset was done already). R1 is connected via Ether1 to the ISP router. I want that R1 can go to the internet, and share internet via wireless so my phone has internet at the end. We will go through many things of what we have learned in this chapter till now when doing the LAB.

Let’s first connect R1 to the internet. I need simply to enable the DHCP client on the interface Ether1:

Let’s check if R1 can go to the internet:

[mepr-show rules=”319″ unauth=”message”]

Indeed, R1 can go to the internet.

Now we need to start configuring the wireless part. Let’s check whether I have 2.4GHz or 5 GHz, or both of them on this router:

I do have 2 wireless interfaces on this router as the following:

  • WLAN1: support 2.4 GHz
  • WLAN2: support 5 GHz

For this LAB, I decided to use the 2.4 GHz (you can choose the 5 GHz and do the same configuration as to what I am going to do).

First, I need to put an IP address on that interface after I enable it. I will use the IP of 172.22.1.1/24

Then I need to configure the DHCP server on the WLAN1 interface, so any machine is connected to that wireless it can get the IP address from the range of 172.22.1.0/24:

The DHCP server has been configured on the WLAN1 interface.

Now I need to configure the NAT so the WLAN IP addresses can be natted to go to the internet:

NAT has been configured. Let’s focus now on the wireless part.

I want to put a password on the wireless. I will use a simple password of 123456789. Let me show you how you can configure that:

I have created a security profile named profile1, which has WPA and WPA2 pre-shared key enabled. You could use only WPA2 because it is more secured, but in case you know that you have someone using an old phone, then WPA2 wouldn’t be supported for him but WPA. That’s why I have enabled WPA also.

So now I have the security profile configured, but this is not yet added to the wireless. Before we do that, we need to check which frequency shall I use where there is less usage on it.

With frequency usage tool, I can see which frequency is last used. I can see that 2427 is less used in my environment, so I will use that one.

Another nice tool that you can use is Snooper, let me show it to you:

Snooper wireless tool will show you how many Access points are in your neighborhood, how many stations are connected to them, what signal level they have, and so forth…. Some hackers use this tool to discover the environment and know where to start the attack.

Back to the wireless configuration, we decided to use the frequency 2427 which is less used. Let’s put it and do some additional setting:

Let me explain what I have done. I have put the mode as AP bridge, so this becomes a wireless Access Point. I have chosen the standard B/G/N referring to the 802.11 standards that I have spoken about in the beginning of this chapter.

Then I have put the frequency 2427 MHz that we saw it is less used in my environment, and I have changed the SSID (service set identifier) to MTCNA, then my wireless will propagate this name so users can connect to it.

Finally, I have put the security profile (profile1) which is the one that I have created with a password of 123456789.

Let’s check if my phone now can get connected to the internet via this wireless:

Here the SSID MTCNA has shown up. Let me connect to it:

I have put the right password and clicked on connect. Let’s see if my phone will be connected to that wireless network:

Excellent!!!! My phone is connected to the wireless.

Let me see if my phone can reach the internet now by pining google.com server:

It is a success ????

So now we know how to share internet via wireless, let me show you some more advanced thing you can do on the wireless in the MikroTik RouterOS.

The 1st thing you need to do is to put your country name on the country tab. I will tell you in a moment why, but let’s just do it now (in my case, I will put Netherlands):

Now that I have put the country, let’s look to the Frequency mode tab and see what it contains:

You can see you have the following 3 options on the Frequency mode:

  • Manual Tx power
  • Regulatory domain
  • Superchannel

Here is the explanation of each one of them:

  • Manual Tx power: the frequency will be limited to what is allowed in your country, but the Tx power doesn’t obey to your country regulation
  • Regulatory domain: both Tx power and frequency range are limited to what is allowed in your country.
  • Superchannel: both Tx power and frequency range do not obey to your country regulation

That’s why, I highly advise that you always use regulatory domain, so you are using the Tx power and frequencies allowed in your country. That’s the reason why I told you to add your country on the setting.

I have put now regulator domain, and if I look to the frequency range, I can see the following:

You can see that you are limited to frequency that are allowed in The Netherlands because I used regulatory domain.

For testing purpose, I will use superchannel and see whether I will get a bigger list of frequency range:

Indeed, the range has become bigger and if you scroll down, you can see that you will reach for a very high frequency.

That’s all what I wanted to show in this LAB, in the upcoming LAB we will work with a 2nd MikroTik router to make it as a station and see what settings we can do there.

[/mepr-show]

0 Comments

Submit a Comment

Your email address will not be published. Required fields are marked *


The reCAPTCHA verification period has expired. Please reload the page.

Please Login to Reply or add a comment!

About