MikroTik Firewall Bridge Filter

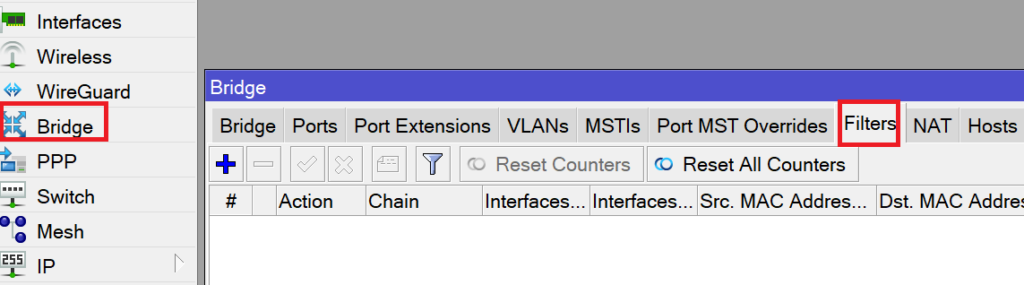
When we were speaking about the packet flow diagram, we have seen that there is a firewall inside the bridging box, meaning that we can do firewall on the Layer 2. That’s what is called “Bridge Filter”.

This can be seen clearly on Winbox when you go to the Bridge:

The question that may ask. What can we do in the bridge filter? Maybe to answer to this question is to make a LAB showing how you can use bridge filter.


LAB: Bridge Filter to Prevent DHCP Rogue

By now, you should already know about the DHCP Rogue attack that an attacker can do (I have explained this with a complete LAB in this book).

Just as a reminder, DHCP Rogue attacks is when an attacker plugs on our network a DHCP Server to lease IPs to the internal devices (as well the gateway address) then he can intercept all traffic that those internal devices will be doing.

I will show you how you can forbid this to happen by using the bridge filter feature we have on Layer 2.

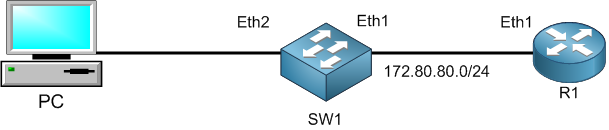
As you see in the graph, R1 is acting as a router with DHCP server enabled, we do have a switch (SW1) acting as a switch in which I have created a bridge port and put inside of it the interfaces Ether1, Ether2 and Ether3 to be bridged together.

IMPORTANT NOTE: please be aware, whenever you need to use the switch bridge filter, the ports that you will be adding in the bridge should not have hardware offload enabled. If you have hardware offload enabled, then the traffic will not go to the router CPU hence the bridge filter will not work.

Let me show you that the 3 interfaces (Ether1, Ether2 and Ether3) have the hardware offload unchecked:

[mepr-show rules=”319″ unauth=”message”]

Now I must make the configuration on the bridge filter. I have to say that any DHCP reply message to a DHCP discover (coming from a client device) has to be accepted to pass in case it is coming on Ether1.

We know that the DHCP server will reply using UDP port 67, so let’s compile that in a rule:

This rule on the SW1 is saying that in case it sees traffic coming to interface Ether1 and passing via the router (chain forward) as UDP with source port 67, then accept this. This is a DHCP server reply message to the DHCP discover message of the client device (DHCP server makes communication with the DHCP client on UDP port 67).

Now I have to make another rule and say, if any interface (except Ether1) has seen UDP port 67 coming to it to go to a DHCP client, then drop it. This way, in case the attacker plug a DHCP server on another interface than Ether1, then he will not be able to form communication between his DHCP server and the DHCP clients.

Now I have the 2 rules ready to be used in the bridge filter:

Let’s try to do the test now. I have everything connected as in the initial picture. I will reset the IP on my PC to see if it will be able to get an IP from the DHCP server:

I have released the IP assigned on my PC. Let’s renew it now:

As a result, my PC has received the IP assignment from the DHCP server.

I am curious to see which of the rules, that I have created on the bridge filter, have worked?

I can see that the 1st rule has increased its bytes/packets, meaning that this is the one that has been matched.

Now I will move R1 and connect it to the interface Ether3 (which is also inside the bridge) and see if my PC will still be able to get an IP assignment.

I have just connected R1 to Ether3 on SW1. Let me release and renew the IP assignment on my PC:

The process has been done. Let’s see if my PC has received an IP assignment from the DHCP server:

Unfortunately it hasn’t received an IP from the DHCP server, it has just an APIPA IP address given by Microsoft Windows OS.

Let’s check if the 2nd bridge filter rule has increased its bytes/packets:

Indeed, I see the bytes and packets on the dropping rule has been increased, meaning that the bridge filter is working perfectly for my scenario.

Last thing I need to do, as usual, is to share with you the script on command line for this LAB:


/interface bridge filter

add action=accept chain=forward in-interface=ether1 ip-protocol=udp mac-protocol=ip src-port=67

add action=drop chain=forward ip-protocol=udp mac-protocol=ip src-port=67

/interface bridge port

add bridge=bridge1 hw=no interface=ether1

add bridge=bridge1 hw=no interface=ether2

add bridge=bridge1 hw=no interface=ether3

[/mepr-show]

0 Comments

Submit a Comment

Your email address will not be published. Required fields are marked *


The reCAPTCHA verification period has expired. Please reload the page.

Please Login to Reply or add a comment!

About