In this chapter, I have to show you how you can connect the MikroTik router to the internet, and how you can share the internet service from the MikroTik router to your connected PC. We will be covering the following topics:
- WAN DHCP-client
- LAN IP address and default gateway
- Basic Firewall – NAT masquerade
- Troubleshooting
Let’s start directly with the 1st LAB of this chapter.
LAB: Connecting the MikroTik router to the internet

I am still on the same LAB scenario. My router is connected to the ISP router on Ether1 interface. To be able to make the router able to go to the internet, I need to enable the DHCP client on the interface Ether1 because the ISP router has DHCP server enabled.
Once I enabled the DHCP client on Ether1 interface, then I will receive on that interface an IP and a subnet mask from the ISP DHCP server. Also, I will receive a DNS and NTP server addresses, as well as a default route so the router can go to the internet.
If we check now on the router, we see no IP is set on Ether1 interface, no subnet mask, no DNS and no default route. Let me show you.
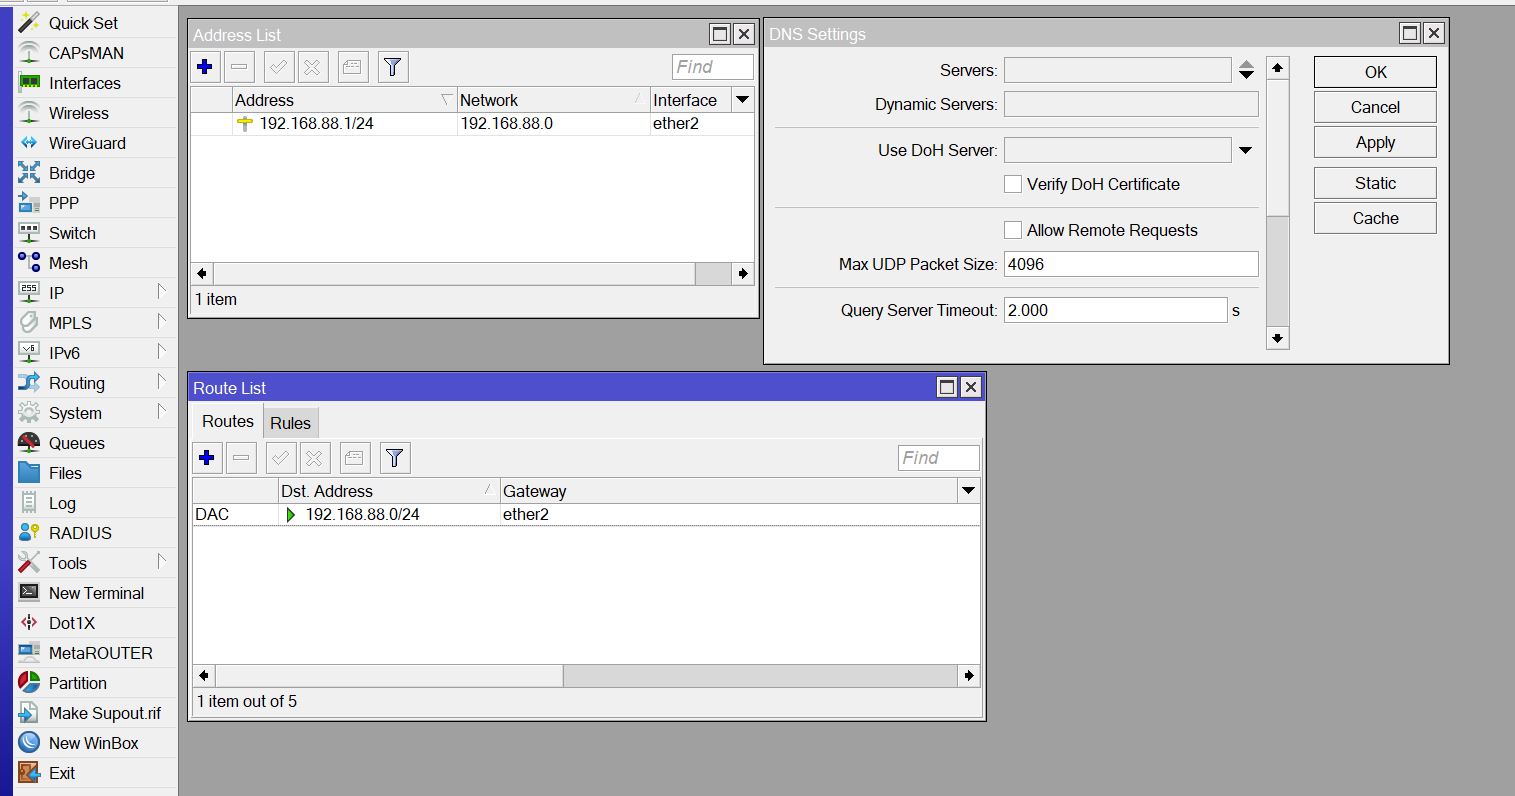
You can see clearly; I don’t have any of those information on the router.
Let’s enabled the DHCP client on Ether1 and see if I get all those information.
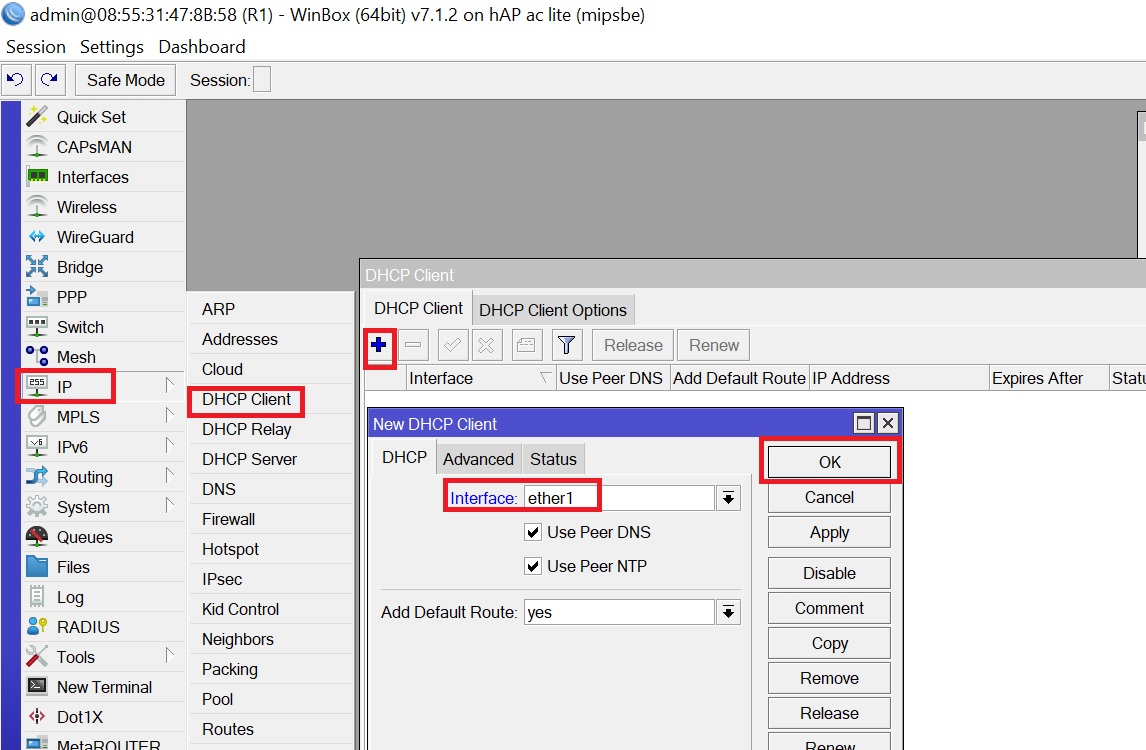
I have enabled DHCP client on Ether1 interface. I have also left the “Use Peer DNS” and “Use Peer NTP” checked so I can get the DNS and NTP server addresses from the provider. Also, I have put the “Add Default Route” to yes so I can get the default route as well. When you enabled the DHCP client on Ether1, then there will be a communication between my router and the ISP router to get all those information from it.
Let’s see if I have received all those information from the ISP router.
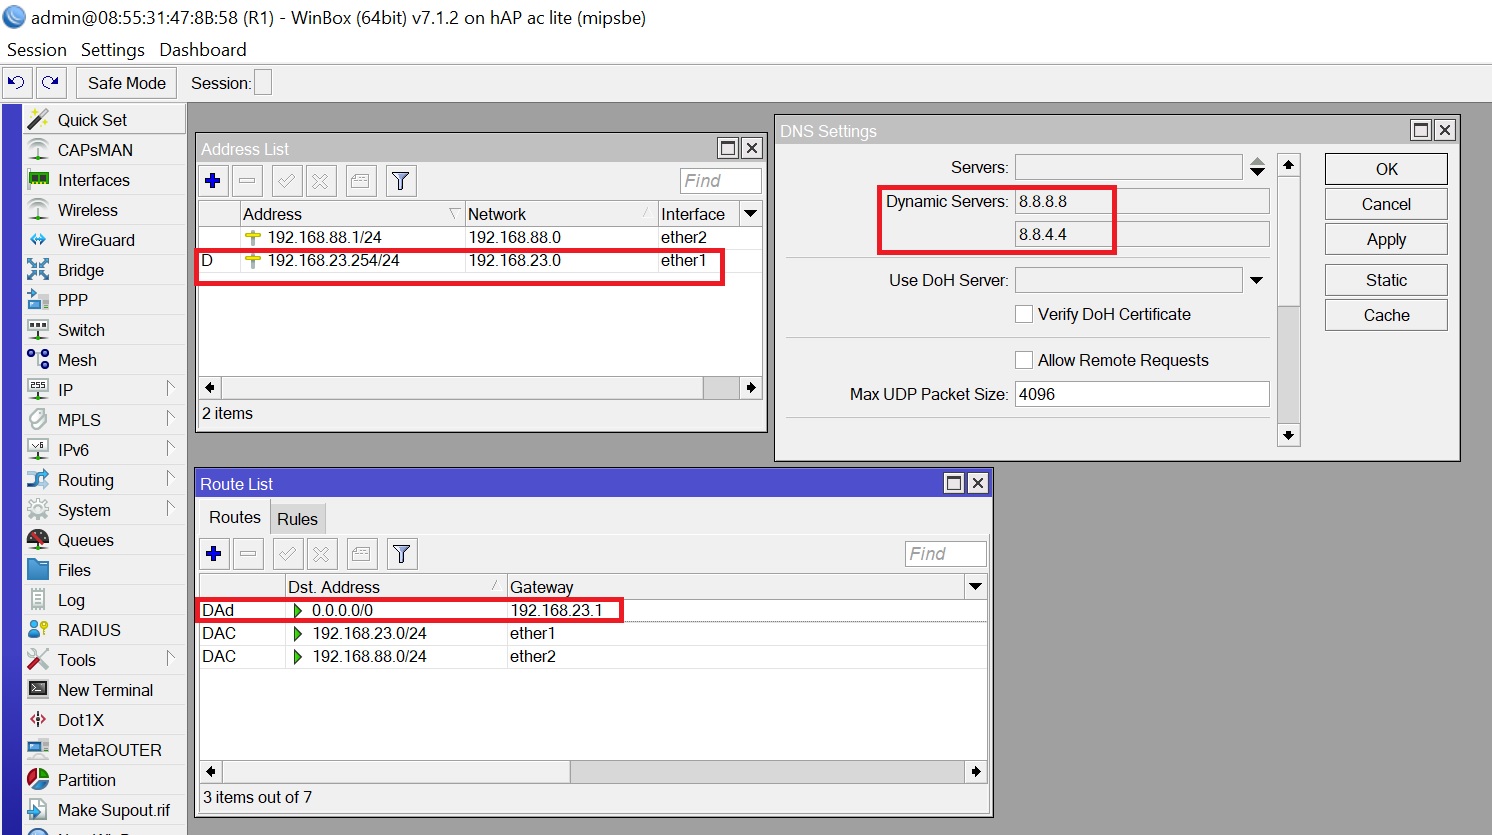
Here we go. I have received from the ISP an IP on Ether1 interface of 192.168.23.254/24 (so that’s the IP and subnet mask).
I have received the DNS servers also which are 8.8.8.8 and 8.8.4.4
I have also received the default route.
That’s really awesome. So now my router is able to go to the internet. Let’s try to ping the google DNS 8.8.8.8 from the router.

It is working!!!!
Now I wish to ping to google.com just to check if the DNS is also working.

It is working as well. So, my DNS is working too.
Now we have the router fully connected to the internet, I wish to share the internet from the router to my PC which is connected on internet Ether2 of the router. Let’s do this task in the upcoming LAB.
0 Comments