Another topic that may be relevant is on Layer 2 security is DHCP Snooping. This is a feature that is available on MikroTik CRS3xx switches as well as all other MikroTik switches. DHCP snooping works as hardware-offload on MikroTik CRS3xx switches.
Once you enable the DHCP snooping on the switch, you can select the port connected to the DHCP server as a trusted port. That means that in case any other Rogue DHCP Server is placed on any un-trust port then it won’t be able to communicate with the DHCP clients. If we don’t use DHCP snooping, you may have someone putting a Rogue DHCP server and will lease IP addresses as well as a Gateway to the DHCP clients, so all their traffic will pass via this DHCP server which can have a sniffing tool which is capable of intercepting all traffics: This is called “Man-in-The-Middle” attack.
This is the simple explanation of the DHCP Snooping; let’s apply it on a LAB.
LAB: DHCP Snooping
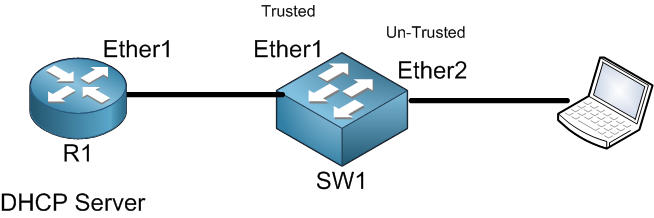
Here R1 is acting as a DHCP server which is already configured. I will create a bridge on SW1 and put inside of it Ether1, Ether2 and Ether3 (will use Ether3 later in this LAB). So the result will be as following:
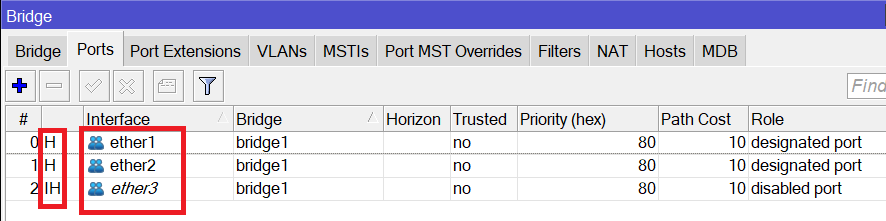
As you can see, the 3 interfaces on SW2 are in a bridge and they are hardware offloaded.
Apologies, the Full Lesson Access is Only for Members....

Get Access to all Lessons from different Vendors
Affordable Price to Enhance your IT Skills!
Always Accessing all Lessons including the New Added Ones

100% Satisfaction Guaranteed!
You can cancel your membership at anytime.
No Questions Asked Whatsover!
0 Comments